
Prepyaments Overview
How to use Translucent Prepayment tools
With Translucent’s Prepayments App, you can automate and streamline this process—mapping prepayment accounts, applying policies, and generating schedules with ease. This guide will walk you through each step, from setting up your accounts to reviewing and posting schedules, so you can manage prepayments efficiently and accurately.
Step 1: Locate the Prepayments App in the left hand panel of the Translucent sidebar.
Step 2: Ensure that Translucent has mapped your prepayment account correctly. Do this from the Settings page or within the Edit Prepayment Accounts found at the top right of any of the Tools within the Prepayments App.
Step 3: Review the prepayment accounts that Translucent has mapped for you. If necessary, remove, add, or edit these accounts.
Step 4: Translucent will populate all relevant invoices that form part of your Prepayment Accounts, flagging any New invoices as they are entered into your accounting system.
These new invoices are classified as either an existing supplier with a new invoice or a new supplier with a new invoice.
Step 5: For existing suppliers, edit the policy of the invoice or confirm it to include it in your schedule.

Step 6: For new Invoices from new Suppliers, Translucent automatically allocates our default policy.
To align with how you want to distribute the prepaid expense, you will be given the option to edit the:
- Policy,
- Release Account, and
- Start Date
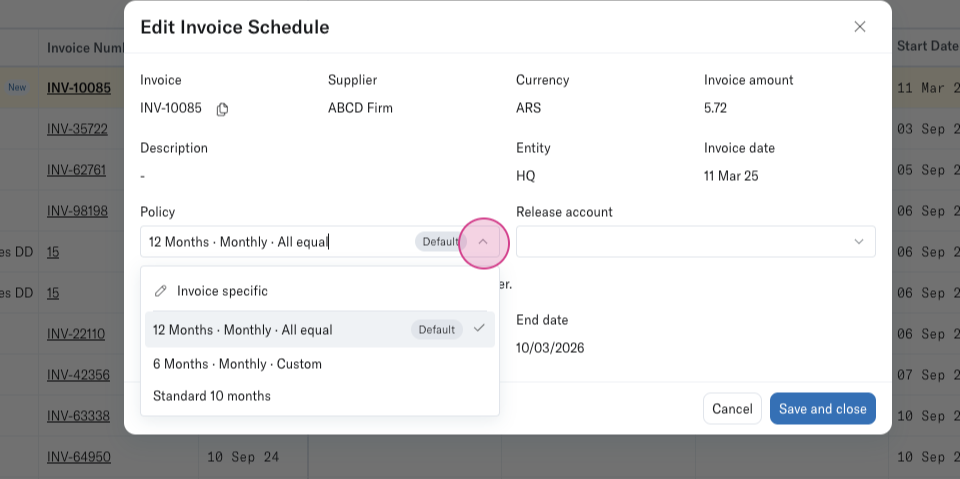
Step 7: Decide if you want to make this policy default for all new invoices from the Supplier
Step 8: Review, create and allocate policies to your suppliers.
Key areas of the Policy are:
1. Release period - How many Months do you want to release the prepayment over?
2. Value Distribution - How do you want to distribute the value across your release period
All Equal - Straightened across the period, or
Custom - Distribute the value based on when you receive the benefit from the supplier
Once allocated these policies will apply to all new invoices being entered into your Prepayment Accounts.
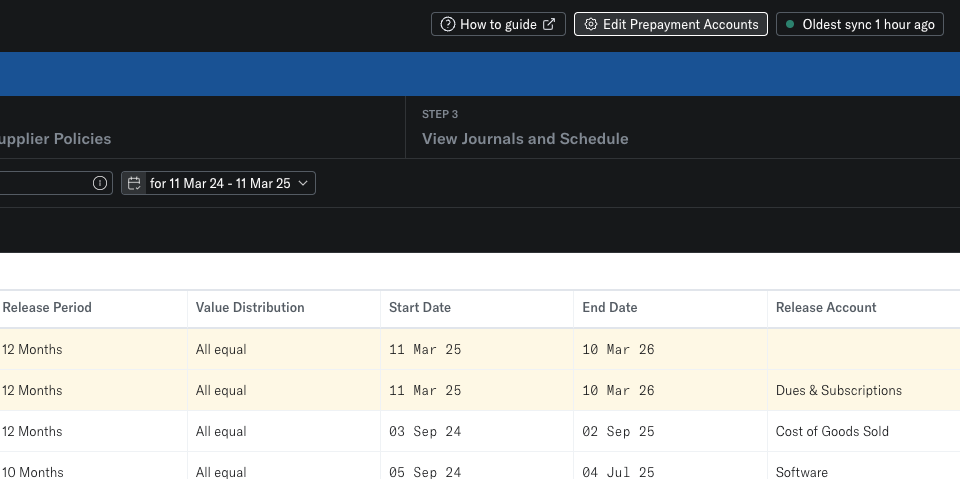
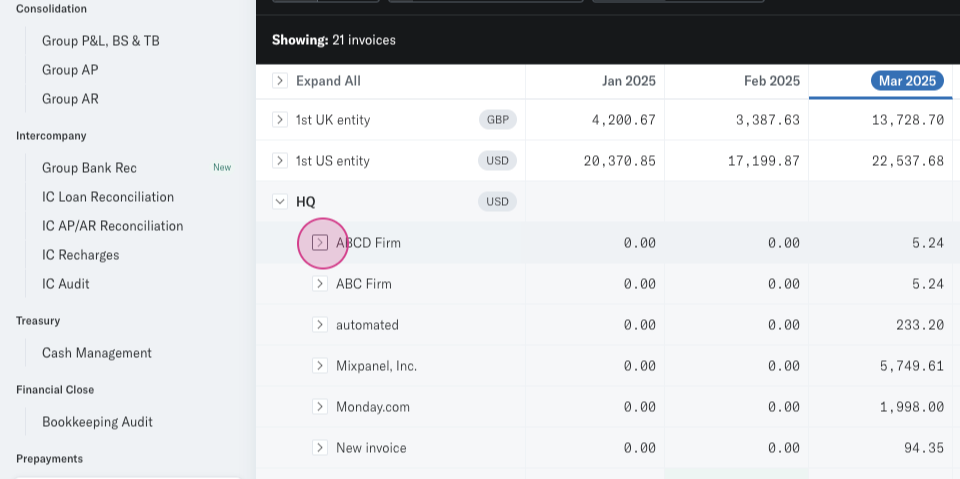
Step 9: In step 3 of the Invoices and Supplier Tool, you can review your prepayment schedule based on the policies and release accounts allocated to your invoices.
Schedules are grouped by Entity and can be broken down on a supplier / invoice level.
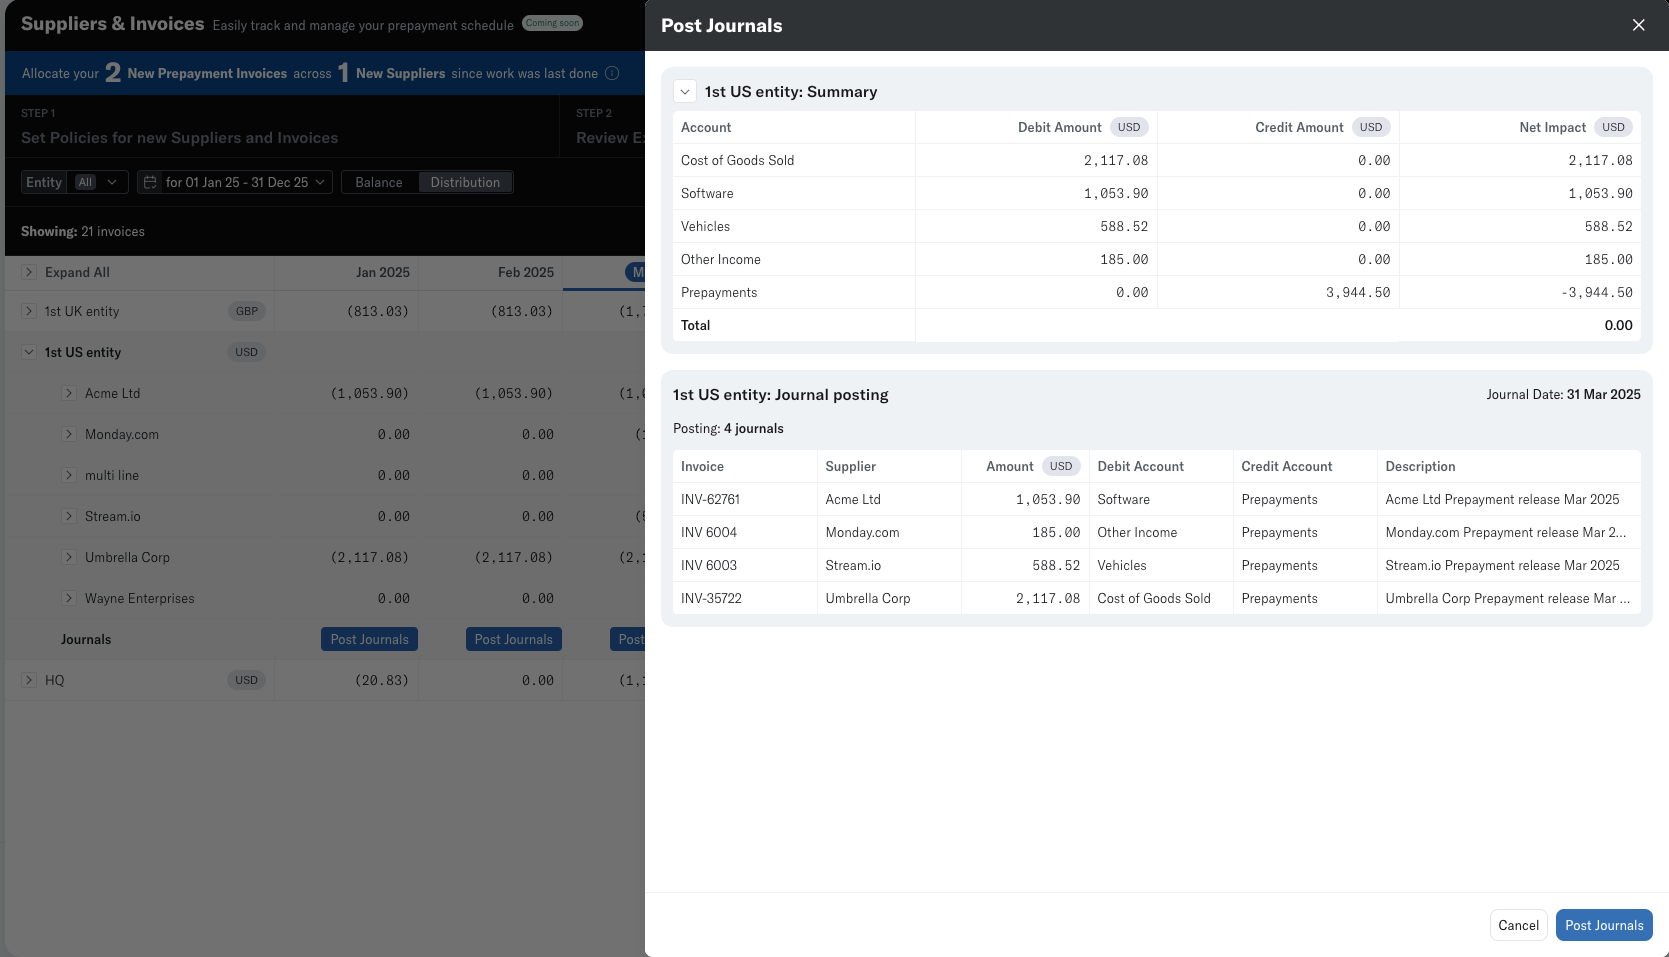
Step 10: View your schedules on a balance basis or a distribution basis.
Step 11: If you want to make changes, edit the policies or schedules, or remove them completely.
If any Journals have been posted by Translucent, these will be reversed and reposted if necessary.
Step 12: When satisfied with the schedule, you can post the journals back to your accounting software.
Step 13: If you prefer not to post journals, download your schedule in Excel to use within your existing workflow.
Step 14: Once you have posted your Journals, you can view them by drilling down into the Journal audit screen.
By following these steps, you’ll take full control of your prepayment accounts—ensuring accurate schedules, seamless policy application, and a streamlined reconciliation process. Whether you’re posting directly to your accounting software or integrating the schedule into your existing workflow, Translucent makes managing prepayments effortless.