TC Audit: Tracking Category Options
Welcome to the Tracking Category Options page. Here, you'll find an overview of your Options by Tracking Category.
In this article we'll guide you through the main features of the App step by step.
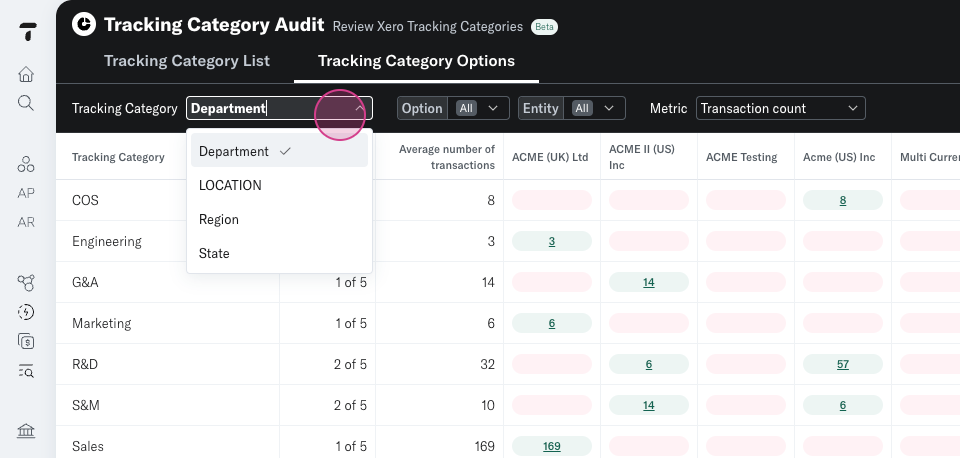
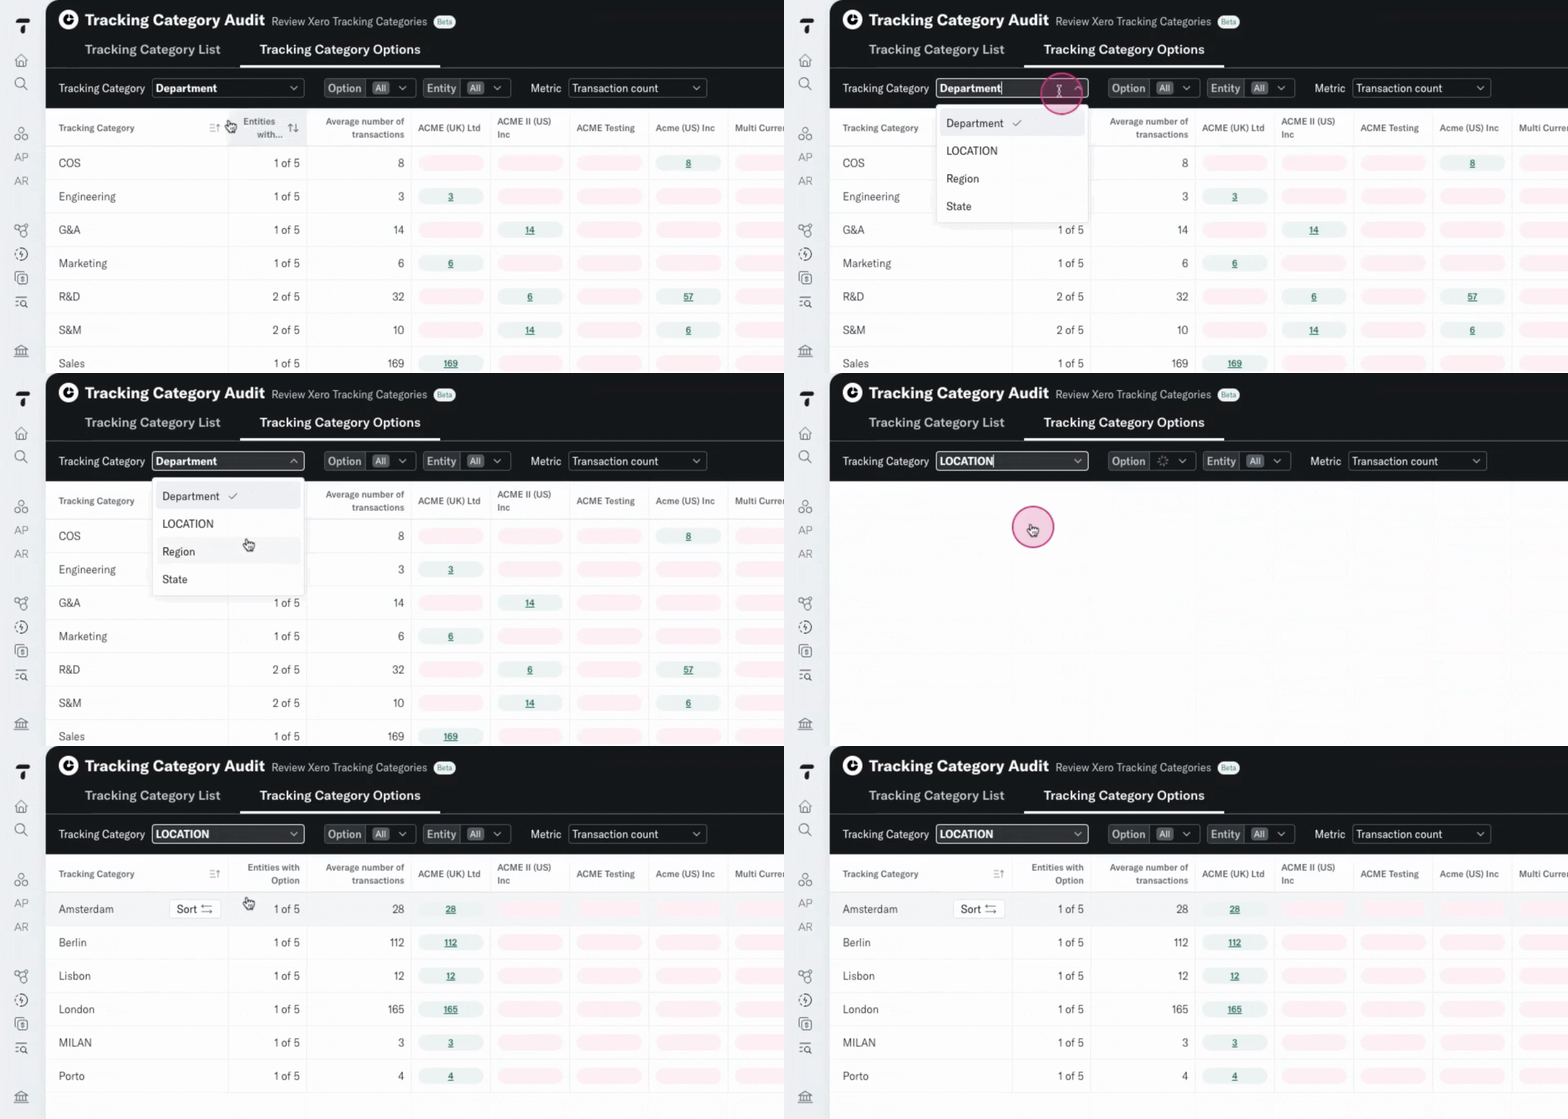
Step 1: To switch to a different Tracking Category, simply select it from the dropdown.
Step 2: You can click on another one of your Tracking Categories in the Tracking Category dropdown. The table will update and present your Options for that Tracking Category.
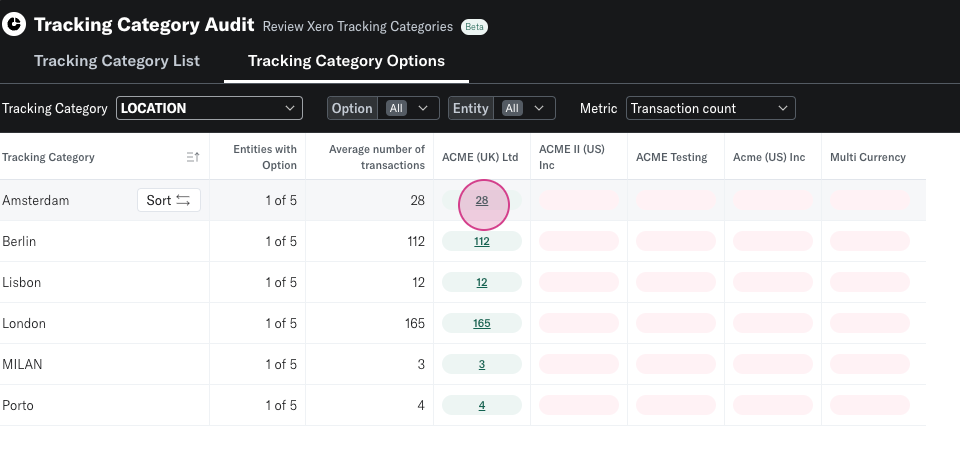
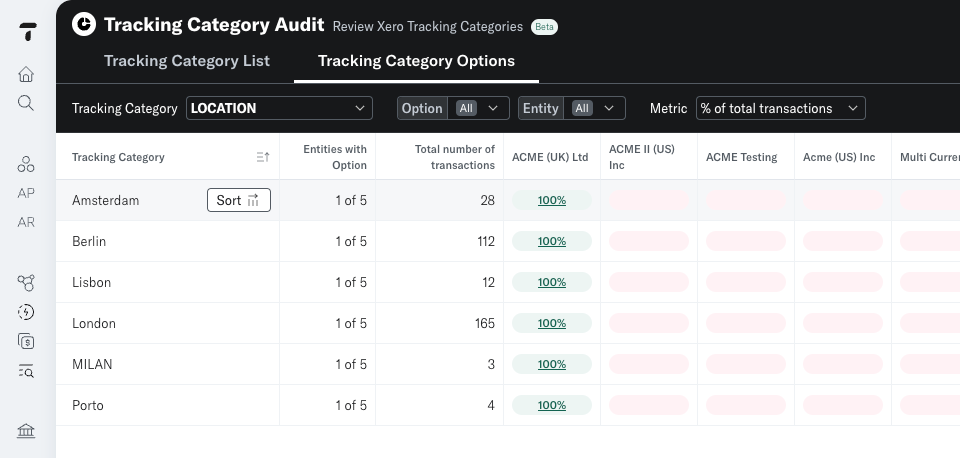
Red cells indicate that the Option does not exist
The green cells indicate that the Option is Present in that entity. The number indicates the number of account transactions that have used that Option in Xero.
Step 3: You can drilldown from the underlined number and view the Account Transactions.
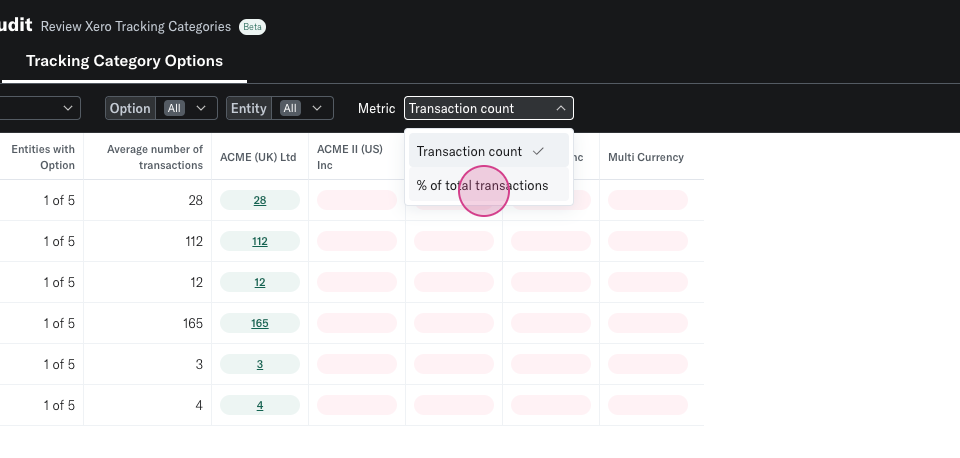
Step 4: You can switch from 'Transaction count' to '% of total transactions'. This will display the % allocation of Options across the group.
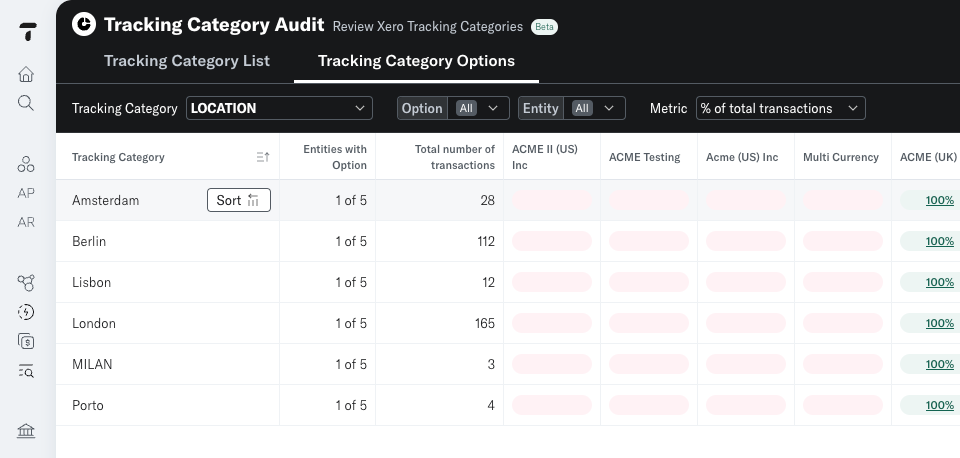
Step 5: You can sort your Options to show entities using the Options at the front
Step 6: or entities not using the Option at the front.
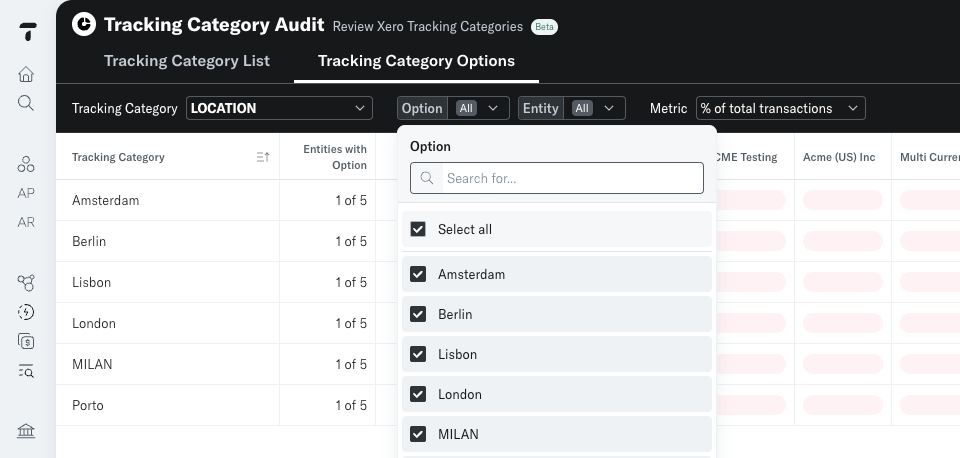
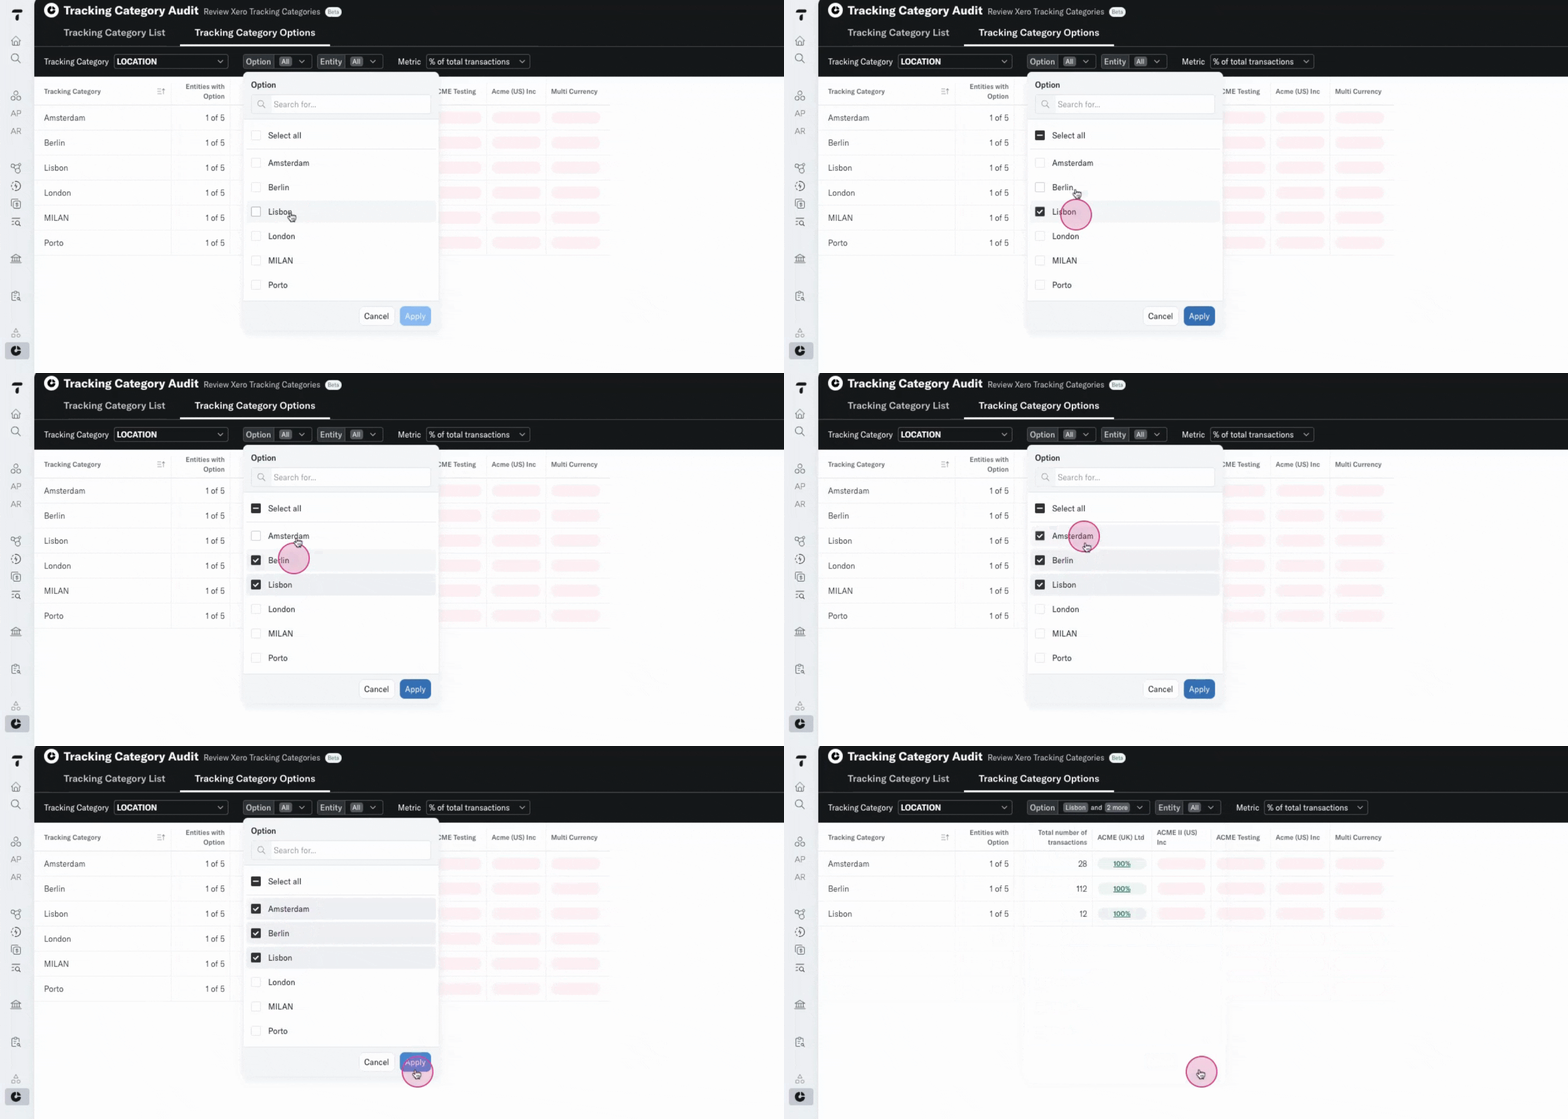
Step 7: You can filter your Options in the Option dropdown.
Step 8: Select the Options you want to view in the matrix.
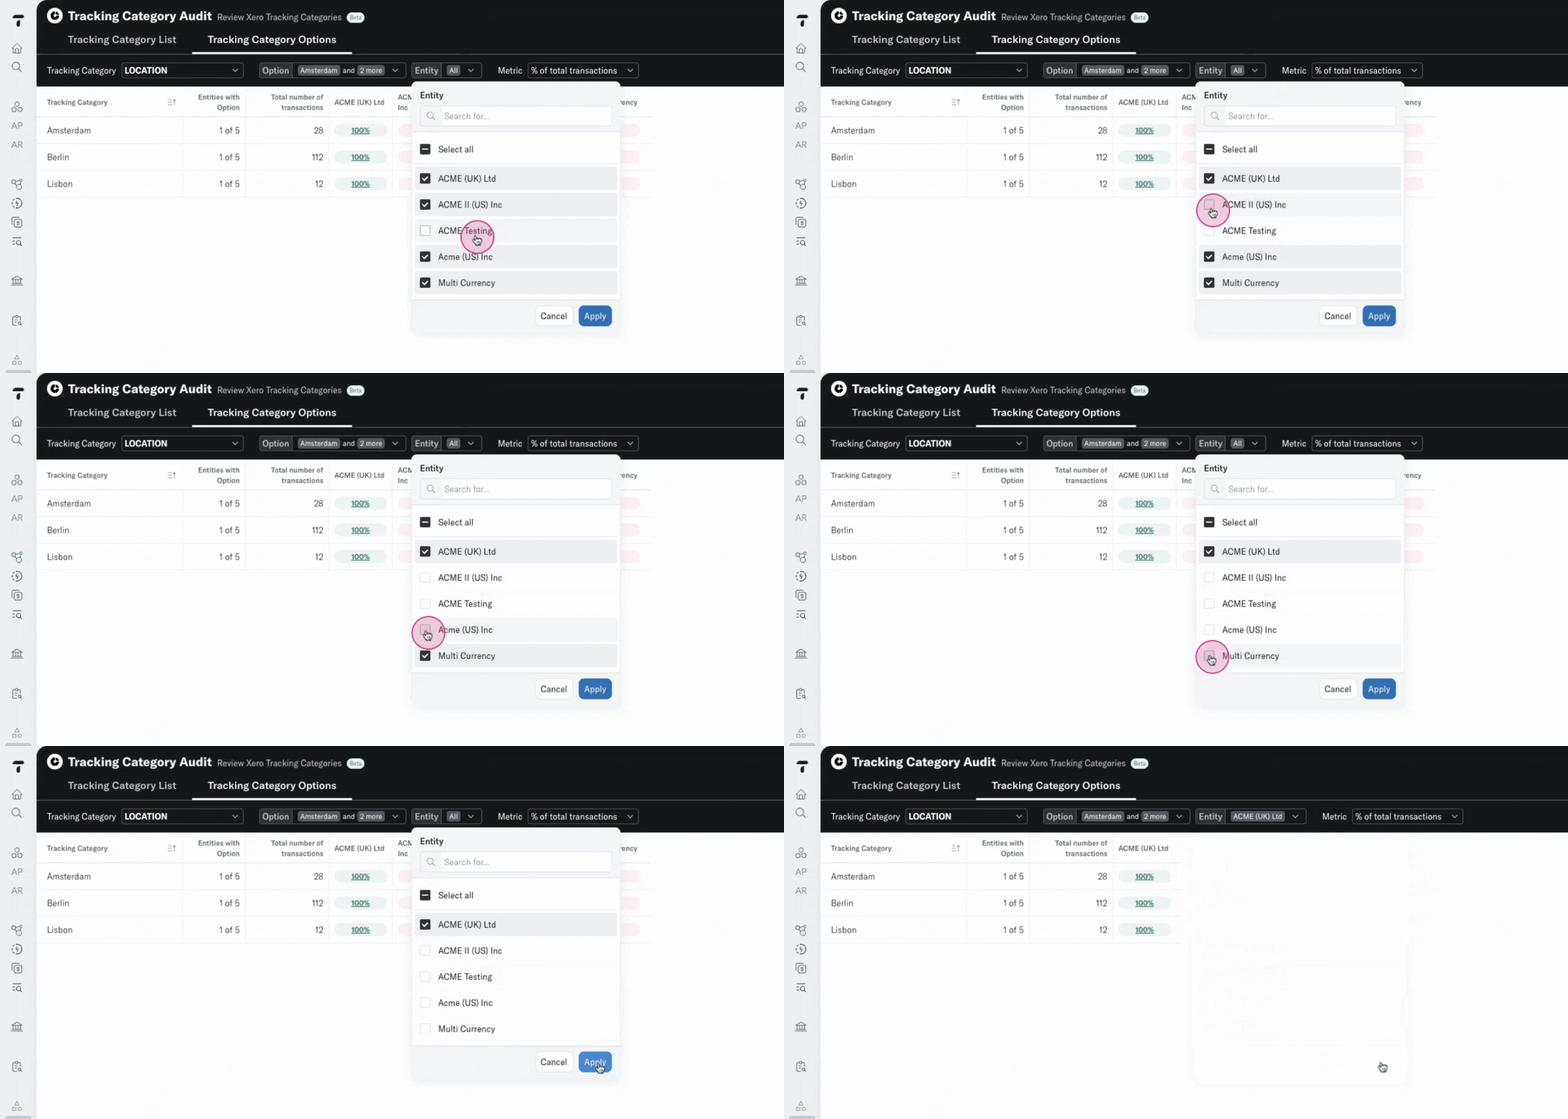
Step 9. You can also select the entities you want to view.

